This easy homemade cheese blintz recipe has a light, tender crepe and a creamy high-protein cottage cheese filling. Perfect for brunch or dessert, and make-ahead friendly! Cottage Cheese Blintz Recipe If you’ve never tried a warm cheese blintz, you’re in for such a treat. Blintzes (sometimes called blintz or blintzes) are delicate crepes filled with […]
Chocolate Zucchini Bread
This healthy Chocolate Zucchini Bread is so rich, moist, and delicious that no one will ever know there’s zucchini in it. You’ll love the crunchy walnuts in every bite! Moist Chocolate Zucchini Bread Recipe I love a good zucchini bread, and this one is sure to please all those chocolate lovers out there! With all the […]
Instant Pot Egg Bites – Cheaper Than Starbucks
These Instant Pot Egg Bites are light, fluffy, and packed with protein—perfect for meal prep! Customize with your favorite fillings, like spinach, cheese, bacon, or vegetables. Instant Pot Egg Bites I love meal prepping these Instant Pot Egg Bites because they’re incredibly fluffy and creamy, thanks to a quick blend and gentle pressure steam. This […]
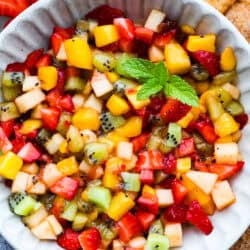
Fresh Fruit Salsa

I can’t stop eating this fresh fruit salsa! Sweet berries, tropical mango, and a splash of lime, get outta here! It’s so good, especially with my crispy cinnamon sugar chips!

Reasons You’ll Be Obsessed!
- Flavor Explosion: A juicy mix of sweet, tangy, and tropical in every bite.
- Versatile: Our favorite way to enjoy fruit salsa is with my cinnamon chips, but tortilla chips also work! You can also serve it over vanilla ice cream, pancakes, crepes, or topped with fresh whipped cream.
- Crowd Charmer: Bright colors + bold flavors = guaranteed compliments.
Fruit Salsa Ingredients

- Apple: The apple adds a crispy texture in every bite! Use your favorite kind of apple.
- Lime: The squeeze of lime helps keep the apple from browning. Substitute with lemon juice if you prefer.
- Fruit Preserves: I LOVE the addition of the raspberry flavor in this salsa, but you can use any flavor preserves you like! Try strawberry, apricot, or orange marmalade.
- Fruit: If you want, you can try switching up the fruit by using pears, peaches, or blueberries. But, avoid using fruit that gets mushy, like bananas and fresh raspberries.
- Add Herbs: You can add fresh herbs like mint and basil to give the salsa depth in flavor. It’s also pretty for garnish!
How to Make Fruit Salsa
This fruit salsa recipe comes together in just minutes. Once you’ve got your fruit prepped, it’s as easy as toss, chill, and serve. Trust me, the hardest part is not eating it all straight from the bowl!
- Add Lime Juice: Squeeze the juice of a lime over the diced apple, then stir to coat.
- Combine Fruit: In a large bowl, combine the strawberries, kiwis, apples, and mangoes.
- Raspberry Jam: Add raspberry jam to the fruit.
- Stir and Serve: Gently stir to combine and serve with cinnamon chips and enjoy!


Alyssa’s Pro Tip
Cutting the Fruit: The trick to perfect fruit salsa is to dice the fruit! You want small and uniform bite-size pieces.

How to Store Fruit Salsa
- In the Refrigerator: Store fruit salsa in an airtight container in the fridge for 2 days. Give it a stir before you serve it again.
- Make in Advance: Fruit salsa is great to make ahead for your guests. I think it’s even better the next day because the juices from the fruit get sweeter as it sits!
- In the Freezer: Do not freeze fresh fruit salsa! If you do, the fruit will thaw into a watery, mushy texture.
Fruit Salsa
#wprm-recipe-user-rating-4 .wprm-rating-star.wprm-rating-star-full svg * { fill: #343434; }#wprm-recipe-user-rating-4 .wprm-rating-star.wprm-rating-star-33 svg * { fill: url(#wprm-recipe-user-rating-4-33); }#wprm-recipe-user-rating-4 .wprm-rating-star.wprm-rating-star-50 svg * { fill: url(#wprm-recipe-user-rating-4-50); }#wprm-recipe-user-rating-4 .wprm-rating-star.wprm-rating-star-66 svg * { fill: url(#wprm-recipe-user-rating-4-66); }linearGradient#wprm-recipe-user-rating-4-33 stop { stop-color: #343434; }linearGradient#wprm-recipe-user-rating-4-50 stop { stop-color: #343434; }linearGradient#wprm-recipe-user-rating-4-66 stop { stop-color: #343434; }
A sweet and refreshing mix of chopped fruit tossed with citrus and a touch of jam. Perfect for parties, snacking, or summer desserts!
Servings 6 Servings
Calories 107kcal
Ingredients
- 1 (16-ounce) container diced strawberries
- 3 medium diced kiwis peeled
- 1 large diced honey crisp apple peeled and cored
- 2 large diced mangoes peeled
- ½ lime juiced
- 2 tablespoons raspberry jam or any flavor
Instructions
- Squeeze the juice of ½ lime over the diced apple and stir to coat.
- To a large bowl, combine 1 (16-ounce) container diced strawberries, 3 medium diced kiwis, 1 large diced honey crisp apple, and 2 large diced mangoes.
- Add 2 tablespoons raspberry jam to the fruit then gently stir to combine.
- Serve with cinnamon chips and enjoy!
Notes
Storage: Store fruit salsa in an airtight container in the fridge for up to 2 days, and give it a quick stir before serving. It’s even better the next day! But don’t freeze it, or you’ll end up with a watery mess.
Nutrition
Calories: 107kcal | Carbohydrates: 27g | Protein: 1g | Fat: 1g | Saturated Fat: 0.1g | Polyunsaturated Fat: 0.2g | Monounsaturated Fat: 0.1g | Sodium: 6mg | Potassium: 257mg | Fiber: 4g | Sugar: 21g | Vitamin A: 809IU | Vitamin C: 63mg | Calcium: 29mg | Iron: 0.3mg
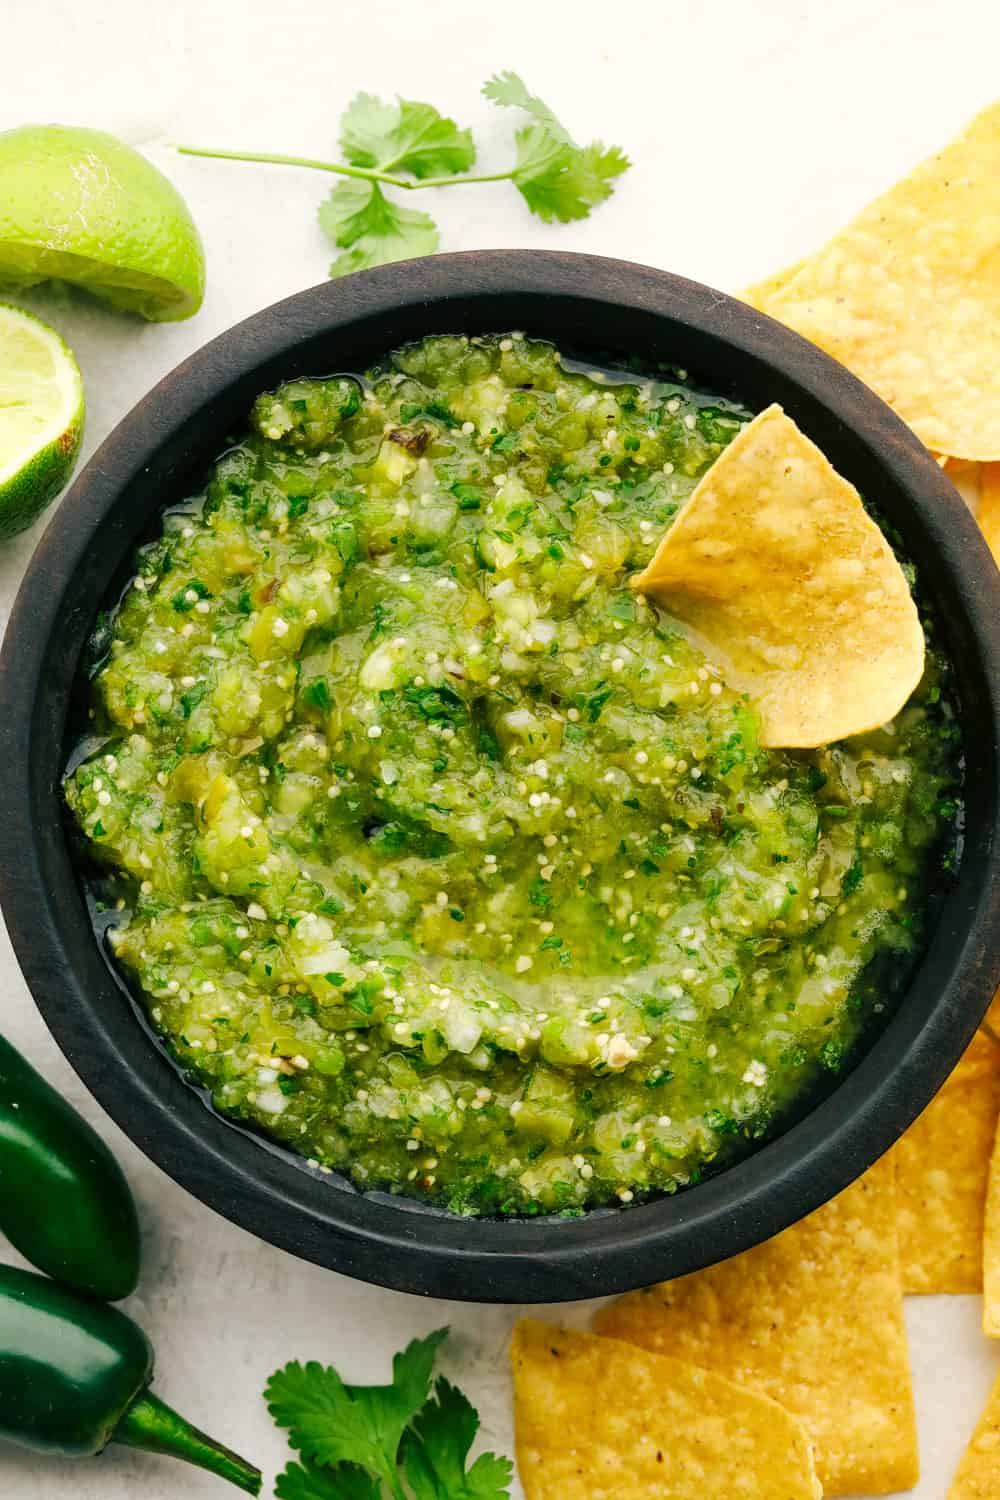
More Dip Recipes to Try!
Dips are always a hit and perfect for just about any get-together! Here are some of my all-time favorites to make for game days, holidays, or casual family hangouts—you’ve got to give them a try!


Fresh Fruit Salsa
I can’t stop eating this fresh fruit salsa! Sweet berries, tropical mango, and a splash of lime, get outta here! It’s so good, especially with my crispy cinnamon sugar chips!

Reasons You’ll Be Obsessed!
- Flavor Explosion: A juicy mix of sweet, tangy, and tropical in every bite.
- Versatile: Our favorite way to enjoy fruit salsa is with my cinnamon chips, but tortilla chips also work! You can also serve it over vanilla ice cream, pancakes, crepes, or topped with fresh whipped cream.
- Crowd Charmer: Bright colors + bold flavors = guaranteed compliments.
Fruit Salsa Ingredients

- Apple: The apple adds a crispy texture in every bite! Use your favorite kind of apple.
- Lime: The squeeze of lime helps keep the apple from browning. Substitute with lemon juice if you prefer.
- Fruit Preserves: I LOVE the addition of the raspberry flavor in this salsa, but you can use any flavor preserves you like! Try strawberry, apricot, or orange marmalade.
- Fruit: If you want, you can try switching up the fruit by using pears, peaches, or blueberries. But, avoid using fruit that gets mushy, like bananas and fresh raspberries.
- Add Herbs: You can add fresh herbs like mint and basil to give the salsa depth in flavor. It’s also pretty for garnish!
How to Make Fruit Salsa
This fruit salsa recipe comes together in just minutes. Once you’ve got your fruit prepped, it’s as easy as toss, chill, and serve. Trust me, the hardest part is not eating it all straight from the bowl!
- Add Lime Juice: Squeeze the juice of a lime over the diced apple, then stir to coat.
- Combine Fruit: In a large bowl, combine the strawberries, kiwis, apples, and mangoes.
- Raspberry Jam: Add raspberry jam to the fruit.
- Stir and Serve: Gently stir to combine and serve with cinnamon chips and enjoy!


Alyssa’s Pro Tip
Cutting the Fruit: The trick to perfect fruit salsa is to dice the fruit! You want small and uniform bite-size pieces.

How to Store Fruit Salsa
- In the Refrigerator: Store fruit salsa in an airtight container in the fridge for 2 days. Give it a stir before you serve it again.
- Make in Advance: Fruit salsa is great to make ahead for your guests. I think it’s even better the next day because the juices from the fruit get sweeter as it sits!
- In the Freezer: Do not freeze fresh fruit salsa! If you do, the fruit will thaw into a watery, mushy texture.
Fruit Salsa
#wprm-recipe-user-rating-4 .wprm-rating-star.wprm-rating-star-full svg * { fill: #343434; }#wprm-recipe-user-rating-4 .wprm-rating-star.wprm-rating-star-33 svg * { fill: url(#wprm-recipe-user-rating-4-33); }#wprm-recipe-user-rating-4 .wprm-rating-star.wprm-rating-star-50 svg * { fill: url(#wprm-recipe-user-rating-4-50); }#wprm-recipe-user-rating-4 .wprm-rating-star.wprm-rating-star-66 svg * { fill: url(#wprm-recipe-user-rating-4-66); }linearGradient#wprm-recipe-user-rating-4-33 stop { stop-color: #343434; }linearGradient#wprm-recipe-user-rating-4-50 stop { stop-color: #343434; }linearGradient#wprm-recipe-user-rating-4-66 stop { stop-color: #343434; }
A sweet and refreshing mix of chopped fruit tossed with citrus and a touch of jam. Perfect for parties, snacking, or summer desserts!
Servings 6 Servings
Calories 107kcal
Ingredients
- 1 (16-ounce) container diced strawberries
- 3 medium diced kiwis peeled
- 1 large diced honey crisp apple peeled and cored
- 2 large diced mangoes peeled
- ½ lime juiced
- 2 tablespoons raspberry jam or any flavor
Instructions
- Squeeze the juice of ½ lime over the diced apple and stir to coat.
- To a large bowl, combine 1 (16-ounce) container diced strawberries, 3 medium diced kiwis, 1 large diced honey crisp apple, and 2 large diced mangoes.
- Add 2 tablespoons raspberry jam to the fruit then gently stir to combine.
- Serve with cinnamon chips and enjoy!
Notes
Storage: Store fruit salsa in an airtight container in the fridge for up to 2 days, and give it a quick stir before serving. It’s even better the next day! But don’t freeze it, or you’ll end up with a watery mess.
Nutrition
Calories: 107kcal | Carbohydrates: 27g | Protein: 1g | Fat: 1g | Saturated Fat: 0.1g | Polyunsaturated Fat: 0.2g | Monounsaturated Fat: 0.1g | Sodium: 6mg | Potassium: 257mg | Fiber: 4g | Sugar: 21g | Vitamin A: 809IU | Vitamin C: 63mg | Calcium: 29mg | Iron: 0.3mg
More Dip Recipes to Try!
Dips are always a hit and perfect for just about any get-together! Here are some of my all-time favorites to make for game days, holidays, or casual family hangouts—you’ve got to give them a try!


Balsamic Chicken Marinade

I’ve been on a balsamic kick lately. Drizzling it on salads, veggies, and even watermelon! But this Balsamic Chicken marinade is pure magic. It’s tangy, a little sweet, and makes everyday chicken taste incredible!

Marinade Magic
- Big Taste, Easy Prep: Balsamic chicken marinade packs bold, tangy flavor using just a few pantry staples.
- Great for Meal Prep: Marinate ahead of time and then cook when you want. Perfect for quick weeknight meals or weekend grilling.
- Cook Your Way: Grill it, pan-sear it, or roast it, this marinade performs like a champ no matter how you cook it up.
- Pairs with Everything: Serve your balsamic chicken on salads, with veggies, rice, or pasta. It’s a tasty go-to for any meal!
Balsamic Chicken Marinade Ingredients

- For sweetness: If you prefer brown sugar, it swaps in easily for the honey. Want it sweeter? Then add a tablespoon or two more of honey.
- Add fresh herbs: Not into Italian seasoning? Skip it and toss in some chopped fresh herbs instead, about a teaspoon each. Rosemary, thyme, and oregano all play really well with balsamic.
- Balsamic vinegar: No need to splurge here, affordable balsamic works perfectly since it gets mixed in. Save the fancy stuff for a drizzle on top when serving.
How to Make Balsamic Chicken Marinade
This easy balsamic chicken marinade takes 5 minutes to prepare! Just whisk the ingredients together and pour them into a large zip-top bag with your chicken!
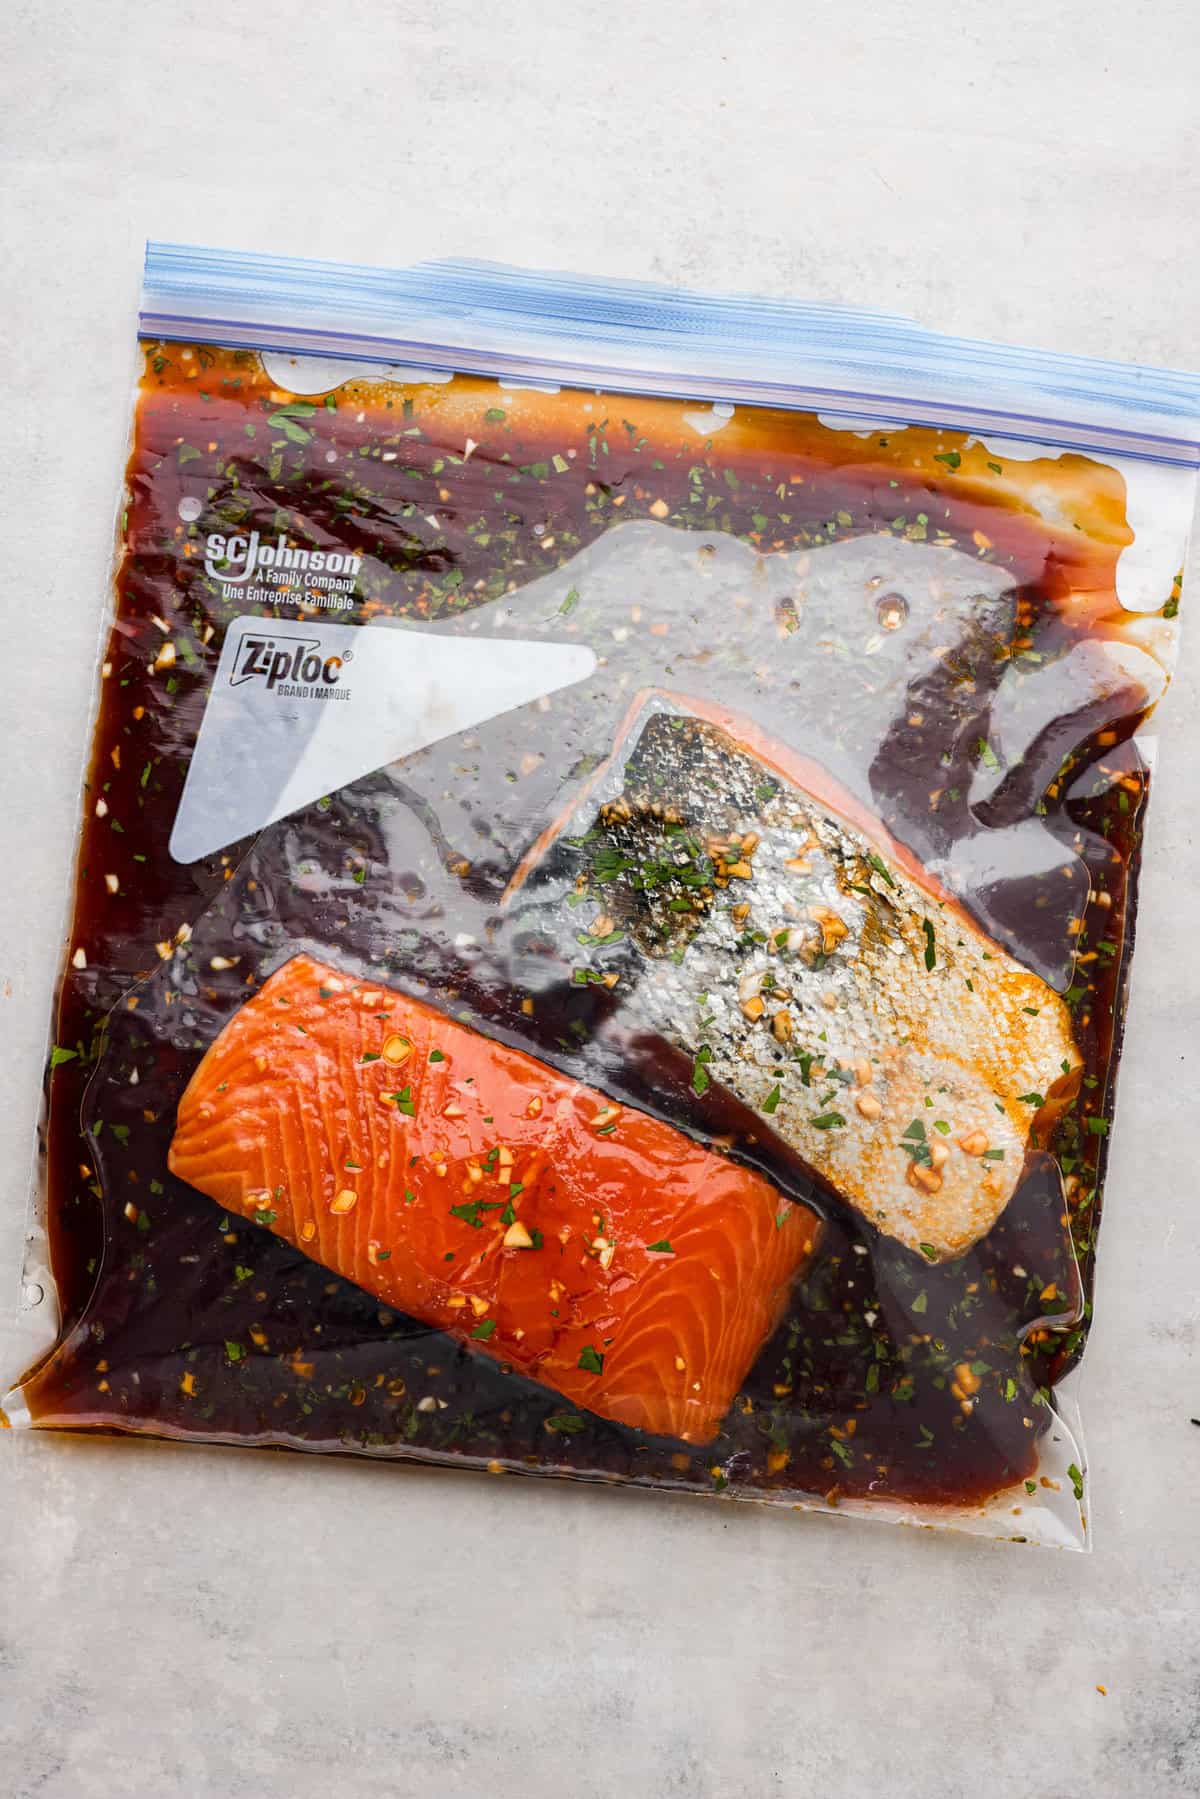
- Combine: Add the chicken breasts to a gallon ziplock bag, then set aside. Add the balsamic vinegar, olive oil, honey, garlic, mustard, Italian seasoning, salt, and pepper to a medium bowl, mix until fully combined.
- Marinate: Pour the marinade over the chicken in the bag and close it. Be sure to press out all the air from the bag. Squish the chicken around to ensure all of it is covered with the marinade. Set it aside to marinate at room temperature for 1-1 ½ hours, or in the fridge for up to 8 hours. *Tip: Don’t marinate too long. If you do it over 8 hours (or 2 at room temp), the vinegar can make it mushy.
- Cook: Once finished marinating, discard the sauce and cook the chicken using your preferred cooking method. *Cooking instructions in recipe card below.


Alyssa’s Pro Tip
Doubling Up? If you’re marinating more than 2 pounds of chicken, go ahead and double the recipe. Every piece of chicken deserves its fair share of balsamic chicken marinade flavor.
Freezing and Storing Cooked Chicken
- Freezing: If you’re freezing the chicken in the balsamic chicken marinade, it’ll keep for up to 3 months. Just thaw it overnight in the fridge before cooking.
- Storing Cooked Chicken: Once cooked, you can then store the chicken in the fridge for up to 7 days, or freeze it in an airtight container for up to 3 months.

Balsamic Chicken Marinade
#wprm-recipe-user-rating-5 .wprm-rating-star.wprm-rating-star-full svg * { fill: #343434; }#wprm-recipe-user-rating-5 .wprm-rating-star.wprm-rating-star-33 svg * { fill: url(#wprm-recipe-user-rating-5-33); }#wprm-recipe-user-rating-5 .wprm-rating-star.wprm-rating-star-50 svg * { fill: url(#wprm-recipe-user-rating-5-50); }#wprm-recipe-user-rating-5 .wprm-rating-star.wprm-rating-star-66 svg * { fill: url(#wprm-recipe-user-rating-5-66); }linearGradient#wprm-recipe-user-rating-5-33 stop { stop-color: #343434; }linearGradient#wprm-recipe-user-rating-5-50 stop { stop-color: #343434; }linearGradient#wprm-recipe-user-rating-5-66 stop { stop-color: #343434; }
This tangy-sweet balsamic chicken marinade comes together in minutes and works like magic whether you’re grilling, baking, or pan-searing.
Servings 6 servings
Calories 267kcal
Equipment
- large ziplock bag
Ingredients
- 2 pounds boneless, skinless chicken breasts or thighs
- ½ cup balsamic vinegar
- 3 tablespoons olive oil
- 1 tablespoon honey optional
- 2 teaspoons minced garlic about 2 cloves
- 1 teaspoon Dijon mustard
- 1 teaspoon Italian seasoning
- 1 ½ teaspoons salt
- ½ teaspoon ground black pepper
Instructions
- Add 2 pounds boneless, skinless chicken breasts to a gallon ziplock bag and set aside.
- Add ½ cup balsamic vinegar, 3 tablespoons olive oil, 1 tablespoon honey, 2 teaspoons minced garlic, 1 teaspoon Dijon mustard, 1 teaspoon Italian seasoning, 1 ½ teaspoons salt, and ½ teaspoon ground black pepper to a medium bowl and mix until fully combined.
- Pour the marinade over the chicken in the bag and close it carefully, pressing out all the air from the bag so the chicken is fully covered in the marinade.
- Squish the chicken around to ensure all of it is covered with the marinade before setting it aside to marinate at room temperature for 1-1 ½ hours, or in the refrigerator for up to 8 hours.
- Once finished marinating, discard the marinade and cook the chicken using your preferred cooking method.
Notes
Storage: Marinate the chicken for up to 8 hours; any longer and the vinegar can make it mushy. You can freeze the raw chicken in the marinade for up to 3 months, or store cooked chicken in the fridge for 7 days or in the freezer for 3 months.
Grill: Preheat the grill to medium heat, then grill the marinated chicken on both sides for 6-8 minutes, or until it reaches an internal temperature of 165°F.
Oven: Preheat the oven to 400°F and bake the chicken for 20-25 minutes, or until it reaches an internal temperature of 165°F.
Skillet: Cook the chicken in a large skillet over medium heat for 5-7 minutes on each side, until it reaches an internal temperature of 165°F.
Nutrition
Calories: 267kcal | Carbohydrates: 7g | Protein: 32g | Fat: 11g | Saturated Fat: 2g | Polyunsaturated Fat: 1g | Monounsaturated Fat: 6g | Trans Fat: 0.02g | Cholesterol: 97mg | Sodium: 771mg | Potassium: 597mg | Fiber: 0.2g | Sugar: 6g | Vitamin A: 53IU | Vitamin C: 2mg | Calcium: 22mg | Iron: 1mg

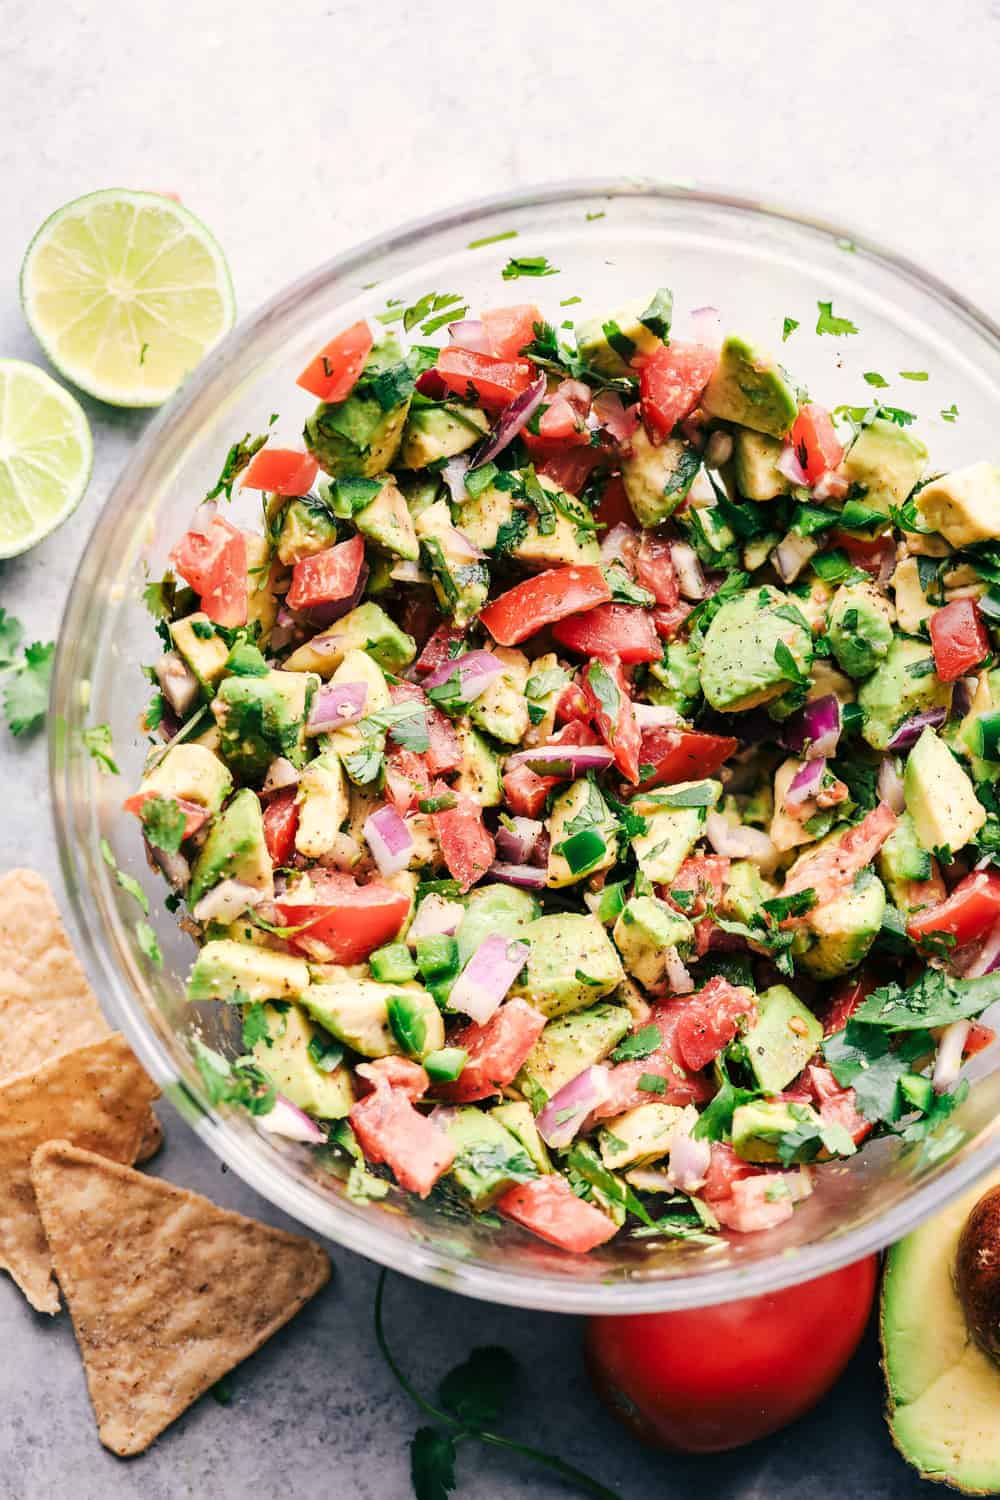
More Marinade Recipes
A good marinade can turn a simple meal into something amazing! It adds flavor, softens the meat, and makes it juicy and delicious. Here are some other tried and true favorites!


Balsamic Chicken Marinade
I’ve been on a balsamic kick lately. Drizzling it on salads, veggies, and even watermelon! But this Balsamic Chicken marinade is pure magic. It’s tangy, a little sweet, and makes everyday chicken taste incredible!

Marinade Magic
- Big Taste, Easy Prep: Balsamic chicken marinade packs bold, tangy flavor using just a few pantry staples.
- Great for Meal Prep: Marinate ahead of time and then cook when you want. Perfect for quick weeknight meals or weekend grilling.
- Cook Your Way: Grill it, pan-sear it, or roast it, this marinade performs like a champ no matter how you cook it up.
- Pairs with Everything: Serve your balsamic chicken on salads, with veggies, rice, or pasta. It’s a tasty go-to for any meal!
Balsamic Chicken Marinade Ingredients

- For sweetness: If you prefer brown sugar, it swaps in easily for the honey. Want it sweeter? Then add a tablespoon or two more of honey.
- Add fresh herbs: Not into Italian seasoning? Skip it and toss in some chopped fresh herbs instead, about a teaspoon each. Rosemary, thyme, and oregano all play really well with balsamic.
- Balsamic vinegar: No need to splurge here, affordable balsamic works perfectly since it gets mixed in. Save the fancy stuff for a drizzle on top when serving.
How to Make Balsamic Chicken Marinade
This easy balsamic chicken marinade takes 5 minutes to prepare! Just whisk the ingredients together and pour them into a large zip-top bag with your chicken!
- Combine: Add the chicken breasts to a gallon ziplock bag, then set aside. Add the balsamic vinegar, olive oil, honey, garlic, mustard, Italian seasoning, salt, and pepper to a medium bowl, mix until fully combined.
- Marinate: Pour the marinade over the chicken in the bag and close it. Be sure to press out all the air from the bag. Squish the chicken around to ensure all of it is covered with the marinade. Set it aside to marinate at room temperature for 1-1 ½ hours, or in the fridge for up to 8 hours. *Tip: Don’t marinate too long. If you do it over 8 hours (or 2 at room temp), the vinegar can make it mushy.
- Cook: Once finished marinating, discard the sauce and cook the chicken using your preferred cooking method. *Cooking instructions in recipe card below.

Alyssa’s Pro Tip
Doubling Up? If you’re marinating more than 2 pounds of chicken, go ahead and double the recipe. Every piece of chicken deserves its fair share of balsamic chicken marinade flavor.
Freezing and Storing Cooked Chicken
- Freezing: If you’re freezing the chicken in the balsamic chicken marinade, it’ll keep for up to 3 months. Just thaw it overnight in the fridge before cooking.
- Storing Cooked Chicken: Once cooked, you can then store the chicken in the fridge for up to 7 days, or freeze it in an airtight container for up to 3 months.

Balsamic Chicken Marinade
#wprm-recipe-user-rating-5 .wprm-rating-star.wprm-rating-star-full svg * { fill: #343434; }#wprm-recipe-user-rating-5 .wprm-rating-star.wprm-rating-star-33 svg * { fill: url(#wprm-recipe-user-rating-5-33); }#wprm-recipe-user-rating-5 .wprm-rating-star.wprm-rating-star-50 svg * { fill: url(#wprm-recipe-user-rating-5-50); }#wprm-recipe-user-rating-5 .wprm-rating-star.wprm-rating-star-66 svg * { fill: url(#wprm-recipe-user-rating-5-66); }linearGradient#wprm-recipe-user-rating-5-33 stop { stop-color: #343434; }linearGradient#wprm-recipe-user-rating-5-50 stop { stop-color: #343434; }linearGradient#wprm-recipe-user-rating-5-66 stop { stop-color: #343434; }
This tangy-sweet balsamic chicken marinade comes together in minutes and works like magic whether you’re grilling, baking, or pan-searing.
Servings 6 servings
Calories 267kcal
Equipment
- large ziplock bag
Ingredients
- 2 pounds boneless, skinless chicken breasts or thighs
- ½ cup balsamic vinegar
- 3 tablespoons olive oil
- 1 tablespoon honey optional
- 2 teaspoons minced garlic about 2 cloves
- 1 teaspoon Dijon mustard
- 1 teaspoon Italian seasoning
- 1 ½ teaspoons salt
- ½ teaspoon ground black pepper
Instructions
- Add 2 pounds boneless, skinless chicken breasts to a gallon ziplock bag and set aside.
- Add ½ cup balsamic vinegar, 3 tablespoons olive oil, 1 tablespoon honey, 2 teaspoons minced garlic, 1 teaspoon Dijon mustard, 1 teaspoon Italian seasoning, 1 ½ teaspoons salt, and ½ teaspoon ground black pepper to a medium bowl and mix until fully combined.
- Pour the marinade over the chicken in the bag and close it carefully, pressing out all the air from the bag so the chicken is fully covered in the marinade.
- Squish the chicken around to ensure all of it is covered with the marinade before setting it aside to marinate at room temperature for 1-1 ½ hours, or in the refrigerator for up to 8 hours.
- Once finished marinating, discard the marinade and cook the chicken using your preferred cooking method.
Notes
Storage: Marinate the chicken for up to 8 hours; any longer and the vinegar can make it mushy. You can freeze the raw chicken in the marinade for up to 3 months, or store cooked chicken in the fridge for 7 days or in the freezer for 3 months.
Grill: Preheat the grill to medium heat, then grill the marinated chicken on both sides for 6-8 minutes, or until it reaches an internal temperature of 165°F.
Oven: Preheat the oven to 400°F and bake the chicken for 20-25 minutes, or until it reaches an internal temperature of 165°F.
Skillet: Cook the chicken in a large skillet over medium heat for 5-7 minutes on each side, until it reaches an internal temperature of 165°F.
Nutrition
Calories: 267kcal | Carbohydrates: 7g | Protein: 32g | Fat: 11g | Saturated Fat: 2g | Polyunsaturated Fat: 1g | Monounsaturated Fat: 6g | Trans Fat: 0.02g | Cholesterol: 97mg | Sodium: 771mg | Potassium: 597mg | Fiber: 0.2g | Sugar: 6g | Vitamin A: 53IU | Vitamin C: 2mg | Calcium: 22mg | Iron: 1mg

More Marinade Recipes
A good marinade can turn a simple meal into something amazing! It adds flavor, softens the meat, and makes it juicy and delicious. Here are some other tried and true favorites!

Creamy Crack Dip

Creamy, cheesy, and loaded with crack dip flavor! This 6-ingredient appetizer is served cold and ready in just 10 minutes. Good luck keeping it on the table.

Why It’s the Dip You Can’t Quit
- Flavor Overload! If you’re obsessed with my crack breakfast casserole or crack chicken sliders, just wait, this crack dip takes things to a whole new level of delicious!
- No Oven Needed: Perfect for hot days or last-minute parties, just mix, chill, and serve!
- Bacon Lovers’ Dream: Crispy bacon bits in every bite make this dip totally crave-worthy.
- Picnic & BBQ Star: Whether you’re poolside or it’s game day, this cool and creamy ranch dip is the first thing to vanish from the snack table!
Crack Dip Ingredients

- Bacon: I love using precooked bacon for convenience. Bacon bits also work, but nothing beats that real, crispy bacon flavor.
- Green Onion: A lot of other recipes only use green onions as a garnish. My recipe mixes the green onion into the dip to give it that savory flavor in every bite!
How to Make Crack Dip
Not only is this easy crack dip recipe perfectly creamy, but it’s cheesy and loaded with that irresistible ranch and bacon combo I know you’ll love. If you like this combo, you should try my poolside dip, million-dollar dip, and boat dip.
- Mix: In a large bowl, mix together sour cream, softened cream cheese, and ranch dressing mix using an electric hand mixer.
- Add the Bacon, Cheese, and Onion: Fold in the crumbled bacon, shredded cheddar cheese, and chopped green onions.
- Serve: Enjoy right away or refrigerate for at least 20 minutes before serving to help the flavors meld.
- Garnish and Serve: Garnish with additional green onions, cheese, and chopped bacon, if desired. Enjoy with veggies, crackers, or potato chips!


Storage and Make-Ahead Instructions
- In the Refrigerator: Store leftover crack dip in an airtight container. Keep in the fridge for up to 4 days. Give it a quick stir before serving again! If needed, stir in a splash of milk if it seems too thick.
- Make Ahead: Crack dip gets even better when you make it ahead of time! Prep it the night before and let the flavors mingle overnight.

Crack Dip
#wprm-recipe-user-rating-6 .wprm-rating-star.wprm-rating-star-full svg * { fill: #343434; }#wprm-recipe-user-rating-6 .wprm-rating-star.wprm-rating-star-33 svg * { fill: url(#wprm-recipe-user-rating-6-33); }#wprm-recipe-user-rating-6 .wprm-rating-star.wprm-rating-star-50 svg * { fill: url(#wprm-recipe-user-rating-6-50); }#wprm-recipe-user-rating-6 .wprm-rating-star.wprm-rating-star-66 svg * { fill: url(#wprm-recipe-user-rating-6-66); }linearGradient#wprm-recipe-user-rating-6-33 stop { stop-color: #343434; }linearGradient#wprm-recipe-user-rating-6-50 stop { stop-color: #343434; }linearGradient#wprm-recipe-user-rating-6-66 stop { stop-color: #343434; }
A 10-minute, no-bake crack dip made with crispy bacon, shredded cheese, ranch seasoning, sour cream, and green onion. Serve it cold!
Servings 8 servings
Calories 311kcal
Ingredients
- 1 (16-ounce) container sour cream
- 1 (8-ounce) package softened cream cheese
- 1 (1-ounce) packet ranch dressing mix
- 1 cup cooked and chopped bacon
- 1 ½ cups shredded cheddar cheese
- ¼ cup chopped green onions
Instructions
- In a large bowl, mix together 1 (16-ounce) container sour cream, 1 (8-ounce) package softened cream cheese, and 1 (1-ounce) packet ranch dressing mix using an electric hand mixer.
- Fold in 1 cup cooked and chopped bacon, 1 ½ cups shredded cheddar cheese, and ¼ cup chopped green onions.
- Serve right away or refrigerate for at least 20 minutes before serving to help the flavors meld. Garnish with additional green onions, cheese, and chopped bacon, if desired. Enjoy with crackers or chips!
Notes
Store crack dip in an airtight container in the fridge for up to 4 days. It’s even better made ahead. Prep it the night before and stir before serving (add a splash of milk if it thickens).
Nutrition
Calories: 311kcal | Carbohydrates: 3g | Protein: 10g | Fat: 29g | Saturated Fat: 14g | Polyunsaturated Fat: 3g | Monounsaturated Fat: 9g | Trans Fat: 0.04g | Cholesterol: 69mg | Sodium: 433mg | Potassium: 121mg | Fiber: 0.1g | Sugar: 1g | Vitamin A: 636IU | Vitamin C: 1mg | Calcium: 181mg | Iron: 0.2mg
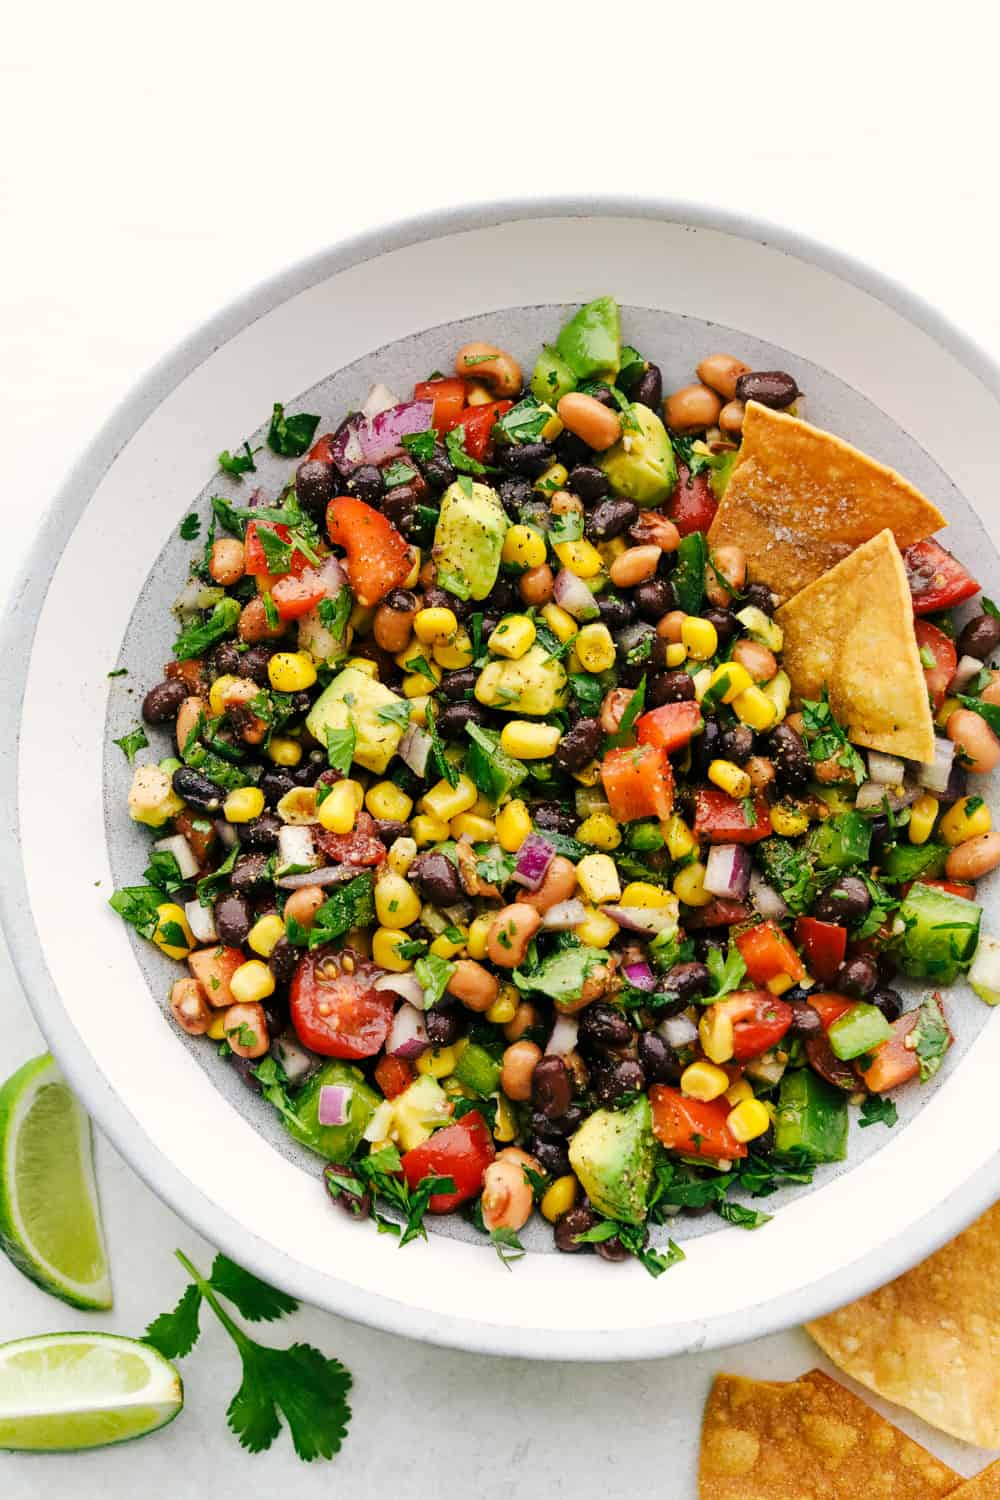
More Easy Dip Recipes


Creamy Crack Dip

Creamy, cheesy, and loaded with crack dip flavor! This 6-ingredient appetizer is served cold and ready in just 10 minutes. Good luck keeping it on the table.

Why It’s the Dip You Can’t Quit
- Flavor Overload! If you’re obsessed with my crack breakfast casserole or crack chicken sliders, just wait, this crack dip takes things to a whole new level of delicious!
- No Oven Needed: Perfect for hot days or last-minute parties, just mix, chill, and serve!
- Bacon Lovers’ Dream: Crispy bacon bits in every bite make this dip totally crave-worthy.
- Picnic & BBQ Star: Whether you’re poolside or it’s game day, this cool and creamy ranch dip is the first thing to vanish from the snack table!
Crack Dip Ingredients

- Bacon: I love using precooked bacon for convenience. Bacon bits also work, but nothing beats that real, crispy bacon flavor.
- Green Onion: A lot of other recipes only use green onions as a garnish. My recipe mixes the green onion into the dip to give it that savory flavor in every bite!
How to Make Crack Dip
Not only is this easy crack dip recipe perfectly creamy, but it’s cheesy and loaded with that irresistible ranch and bacon combo I know you’ll love. If you like this combo, you should try my poolside dip, million-dollar dip, and boat dip.
- Mix: In a large bowl, mix together sour cream, softened cream cheese, and ranch dressing mix using an electric hand mixer.
- Add the Bacon, Cheese, and Onion: Fold in the crumbled bacon, shredded cheddar cheese, and chopped green onions.
- Serve: Enjoy right away or refrigerate for at least 20 minutes before serving to help the flavors meld.
- Garnish and Serve: Garnish with additional green onions, cheese, and chopped bacon, if desired. Enjoy with veggies, crackers, or potato chips!


Storage and Make-Ahead Instructions
- In the Refrigerator: Store leftover crack dip in an airtight container. Keep in the fridge for up to 4 days. Give it a quick stir before serving again! If needed, stir in a splash of milk if it seems too thick.
- Make Ahead: Crack dip gets even better when you make it ahead of time! Prep it the night before and let the flavors mingle overnight.

Crack Dip
#wprm-recipe-user-rating-6 .wprm-rating-star.wprm-rating-star-full svg * { fill: #343434; }#wprm-recipe-user-rating-6 .wprm-rating-star.wprm-rating-star-33 svg * { fill: url(#wprm-recipe-user-rating-6-33); }#wprm-recipe-user-rating-6 .wprm-rating-star.wprm-rating-star-50 svg * { fill: url(#wprm-recipe-user-rating-6-50); }#wprm-recipe-user-rating-6 .wprm-rating-star.wprm-rating-star-66 svg * { fill: url(#wprm-recipe-user-rating-6-66); }linearGradient#wprm-recipe-user-rating-6-33 stop { stop-color: #343434; }linearGradient#wprm-recipe-user-rating-6-50 stop { stop-color: #343434; }linearGradient#wprm-recipe-user-rating-6-66 stop { stop-color: #343434; }
A 10-minute, no-bake crack dip made with crispy bacon, shredded cheese, ranch seasoning, sour cream, and green onion. Serve it cold!
Servings 8 servings
Calories 311kcal
Ingredients
- 1 (16-ounce) container sour cream
- 1 (8-ounce) package softened cream cheese
- 1 (1-ounce) packet ranch dressing mix
- 1 cup cooked and chopped bacon
- 1 ½ cups shredded cheddar cheese
- ¼ cup chopped green onions
Instructions
- In a large bowl, mix together 1 (16-ounce) container sour cream, 1 (8-ounce) package softened cream cheese, and 1 (1-ounce) packet ranch dressing mix using an electric hand mixer.
- Fold in 1 cup cooked and chopped bacon, 1 ½ cups shredded cheddar cheese, and ¼ cup chopped green onions.
- Serve right away or refrigerate for at least 20 minutes before serving to help the flavors meld. Garnish with additional green onions, cheese, and chopped bacon, if desired. Enjoy with crackers or chips!
Notes
Store crack dip in an airtight container in the fridge for up to 4 days. It’s even better made ahead. Prep it the night before and stir before serving (add a splash of milk if it thickens).
Nutrition
Calories: 311kcal | Carbohydrates: 3g | Protein: 10g | Fat: 29g | Saturated Fat: 14g | Polyunsaturated Fat: 3g | Monounsaturated Fat: 9g | Trans Fat: 0.04g | Cholesterol: 69mg | Sodium: 433mg | Potassium: 121mg | Fiber: 0.1g | Sugar: 1g | Vitamin A: 636IU | Vitamin C: 1mg | Calcium: 181mg | Iron: 0.2mg
More Easy Dip Recipes

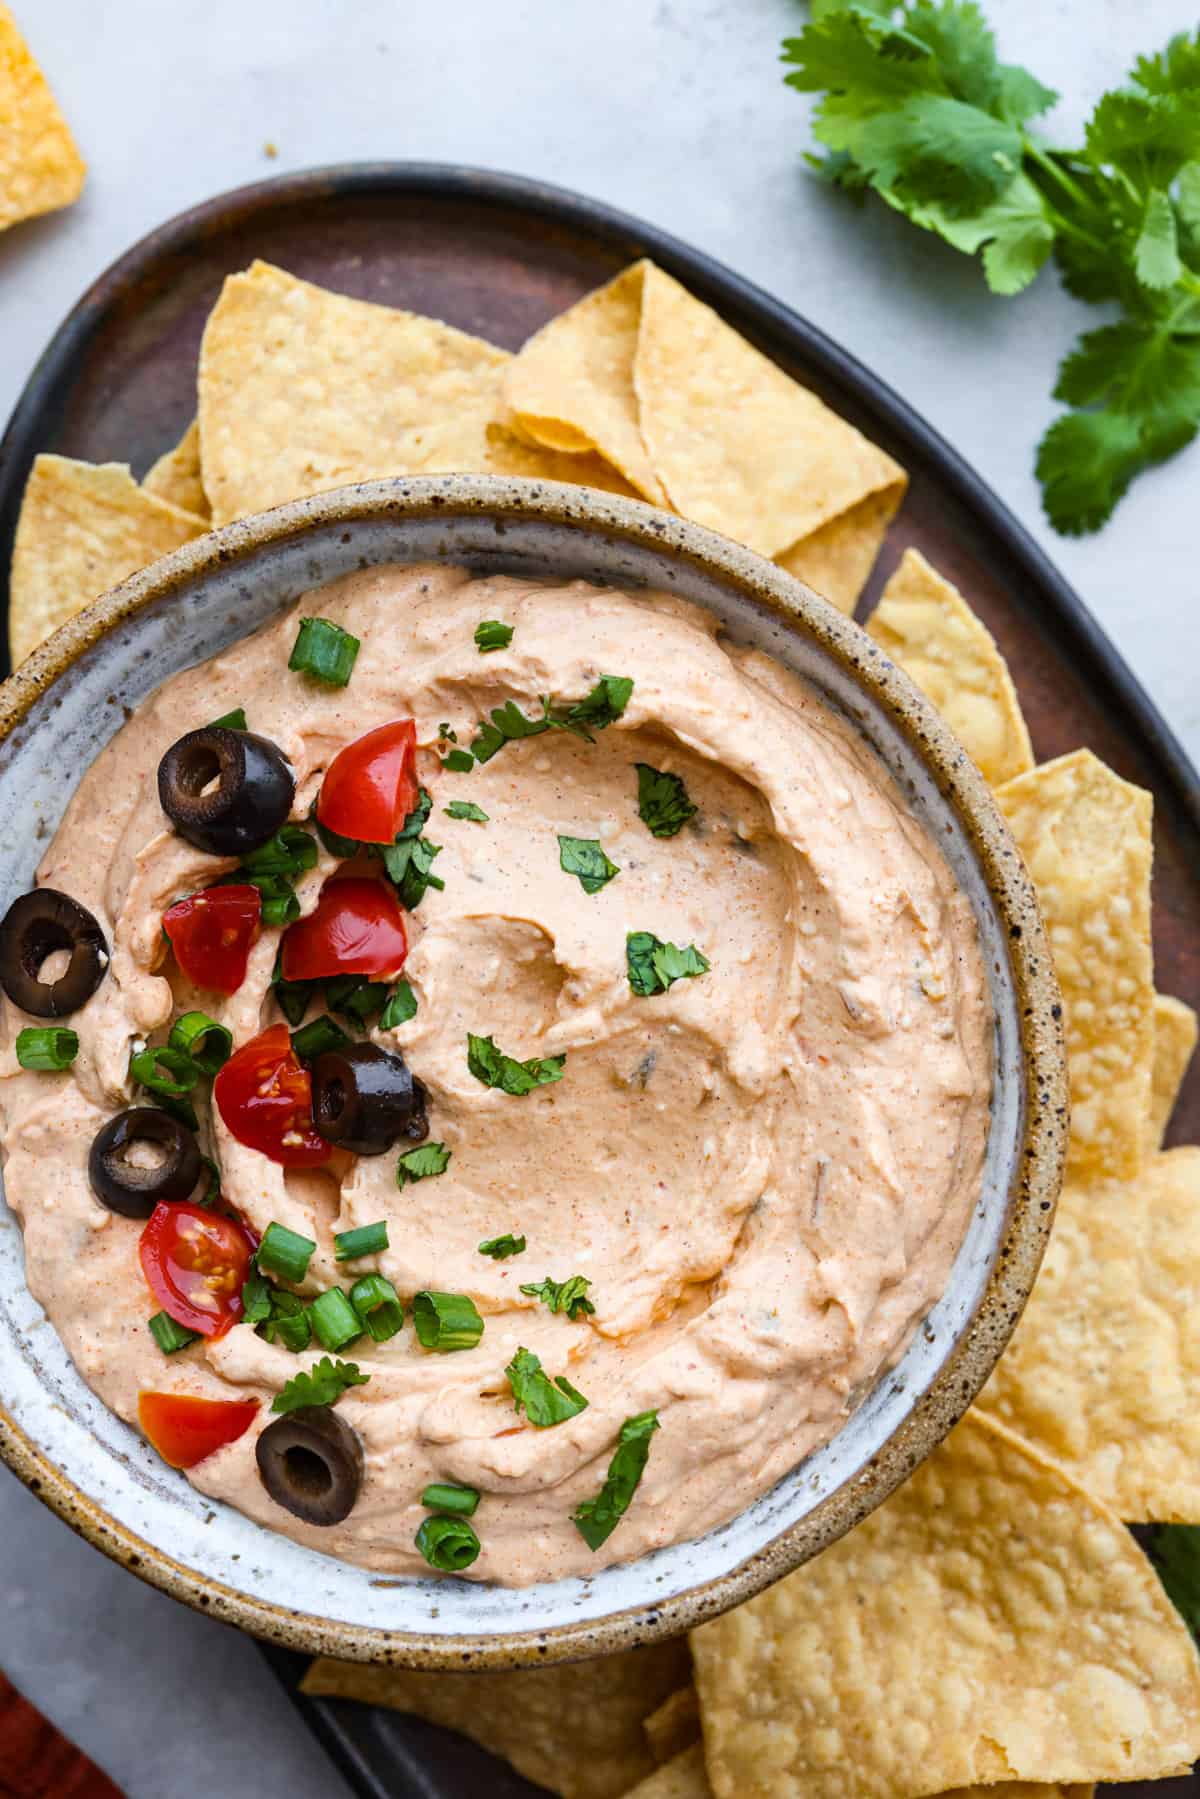

Creamy Boat Dip

This viral boat dip is blowing up on the socials, and for good reason. It’s creamy, cheesy, and the best flavor. It’s the easiest appetizer for lake days, BBQs, or any summer hangout.

One Bite and You’re Hooked
- Ridiculously Easy: All you need is 7 simple ingredients and 10 minutes!
- Perfect for Parties: Not only is it great for the boat, but I love to make this ahead of time for BBQs, pool days, or game nights.
- Customizable: If you want, you can add diced vegetables like bell peppers, cucumbers, corn, or any of your favorites.
Boat Dip Ingredients

- Spice Level: This dip isn’t very spicy, but if you’re sensitive to heat, use mild Rotel. Want to turn it up? Try hot Rotel, diced jalapeños, a dash of hot sauce, or a pinch of cayenne to give it more of a kick!
- Sour Cream: Use Greek yogurt in place of sour cream for added protein.
- Canned Add-Ins: Want to bulk it up? Toss in a can of corn, black beans, or any veggie you love, just make sure to drain them well.
- More Add-In Ideas: Fresh diced jalapeños, bell peppers, green onions, or whatever’s hanging out in your fridge, get creative!
- Reduce the Sodium: If you are sensitive to sodium, reduce both the taco seasoning and ranch seasoning to 2 tablespoons each, OR use homemade seasoning mixes that don’t contain added salt.
How to Make TikTok Boat Dip
Grab a bowl, toss it all in, and stir; it’s that easy. This is the kind of snack that vanishes before you can even say ‘pass the chips!’
- Make the Creamy Base: Whisk the sour cream and softened cream cheese together in a large mixing bowl until smooth.
- Add Ingredients: Add the can of Rotel tomatoes and green chilies, cheese, ranch seasoning mix, and taco seasoning mix to the same bowl. Mix until everything is well combined. Serve immediately or cover and store in the fridge until ready to serve. Then, garnish with cilantro and serve with tortilla chips, fresh veggies like carrots or celery sticks, crackers, crostini, or, like me, straight from the spoon!


Make Ahead and Storage Instructions
- Make Ahead: Boat dip gets even better with time. Prep it the night before and let the flavors mingle overnight.
- In the Refrigerator: Store the dip in an airtight container in the fridge for up to 4 days.
- In the Freezer: I don’t recommend freezing this dip; it’s best enjoyed fresh!

Boat Dip
#wprm-recipe-user-rating-7 .wprm-rating-star.wprm-rating-star-full svg * { fill: #343434; }#wprm-recipe-user-rating-7 .wprm-rating-star.wprm-rating-star-33 svg * { fill: url(#wprm-recipe-user-rating-7-33); }#wprm-recipe-user-rating-7 .wprm-rating-star.wprm-rating-star-50 svg * { fill: url(#wprm-recipe-user-rating-7-50); }#wprm-recipe-user-rating-7 .wprm-rating-star.wprm-rating-star-66 svg * { fill: url(#wprm-recipe-user-rating-7-66); }linearGradient#wprm-recipe-user-rating-7-33 stop { stop-color: #343434; }linearGradient#wprm-recipe-user-rating-7-50 stop { stop-color: #343434; }linearGradient#wprm-recipe-user-rating-7-66 stop { stop-color: #343434; }
This viral boat dip is your new go-to party favorite! It’s cool, creamy, and loaded with flavor. Just stir it up, chill, and dive in with chips!
Servings 8 Servings
Calories 148kcal
Ingredients
- 1 (16-ounce) container sour cream
- 1 (8-ounce) block softened cream cheese
- 1 (10-ounce) drained can Rotel tomatoes and green chilies
- 2 cups shredded Colby Jack cheese
- 1 packet ranch seasoning mix
- 1 packet taco seasoning mix
Instructions
- Whisk the 1 (16-ounce) container sour cream and 1 (8-ounce) block softened cream cheese together in a large bowl until smooth.
- Add the 1 (10-ounce) drained can Rotel tomatoes and green chilies, 2 cups shredded Colby Jack cheese, 1 packet ranch seasoning mix, and 1 packet taco seasoning mix to the same bowl.
- Mix until everything is well combined. Serve immediately or cover and store in the fridge until ready to serve.
Notes
Leftover Instructions: Store the dip in an airtight container in the fridge for up to 4 days.
Nutrition
Calories: 148kcal | Carbohydrates: 5g | Protein: 8g | Fat: 11g | Saturated Fat: 7g | Polyunsaturated Fat: 0.3g | Monounsaturated Fat: 3g | Cholesterol: 31mg | Sodium: 816mg | Potassium: 43mg | Fiber: 1g | Sugar: 1g | Vitamin A: 739IU | Vitamin C: 2mg | Calcium: 227mg | Iron: 1mg

More Easy Dip Recipes
I’m a firm believer that dip counts as a meal, and boat dip has officially earned a top spot on my list. It’s right up there with my favorites like creamy jalapeño dip, beef enchilada dip, and that ridiculously good cheeseburger dip.

